
Class Management User Guide
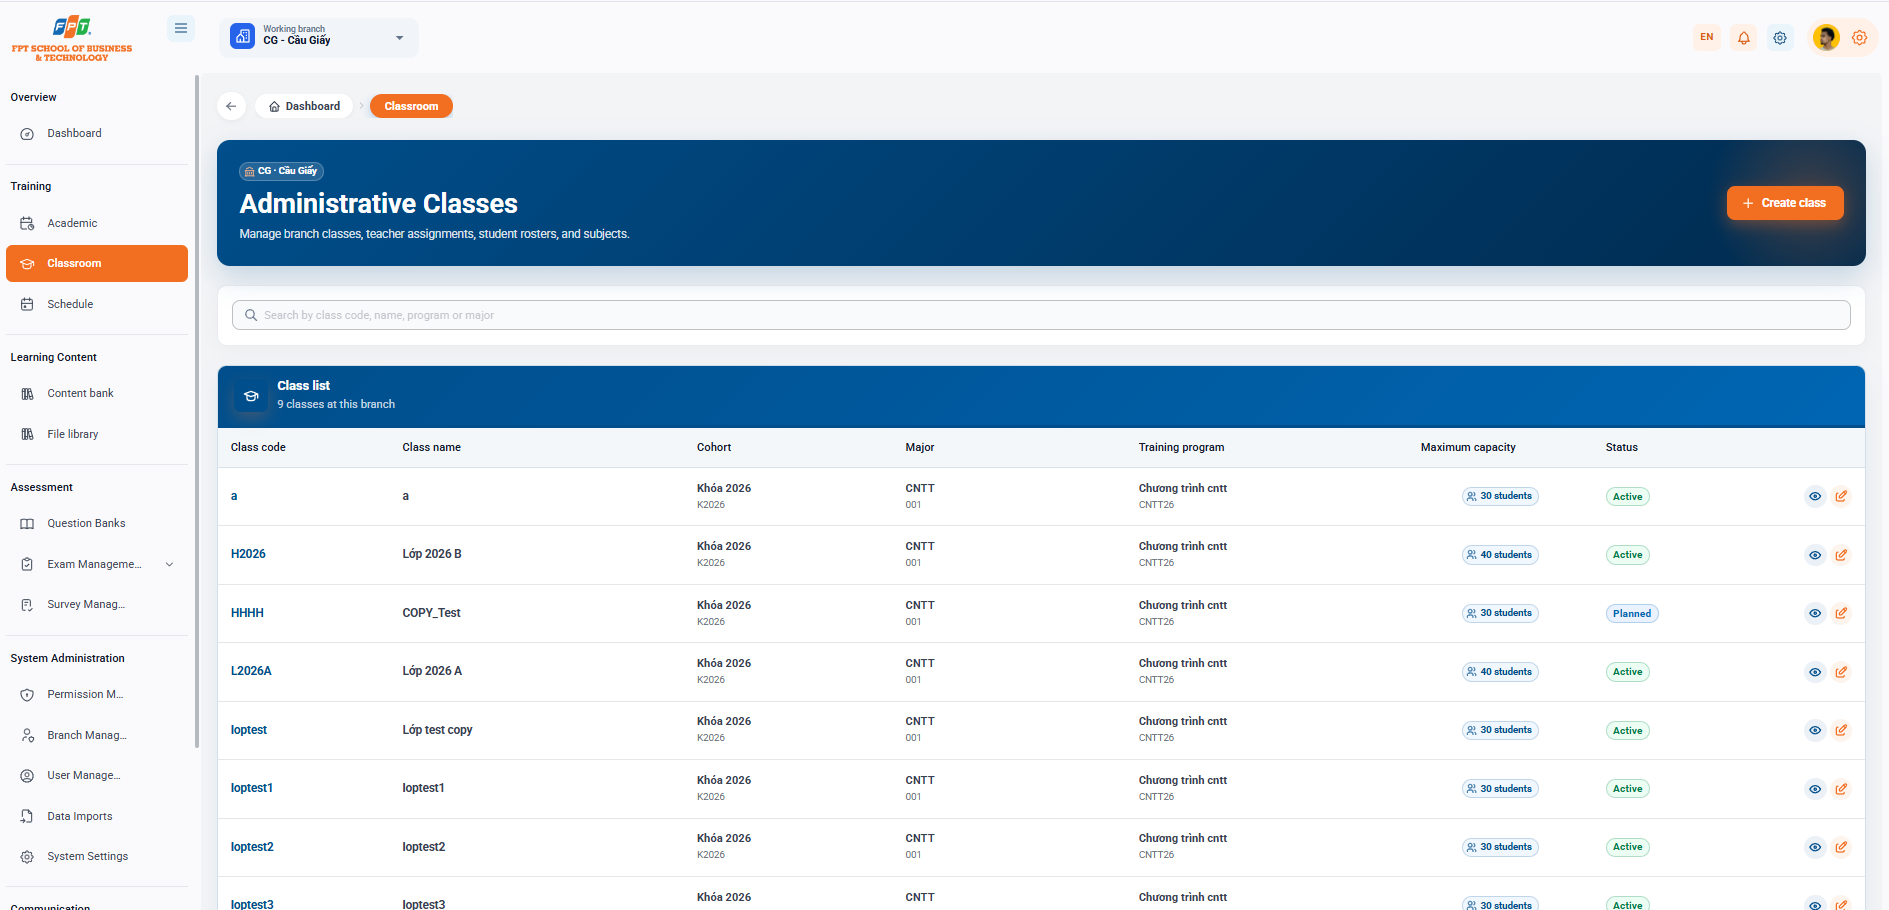
The Classroom Division of the Teaching category supports the management of administrative class lists, faculty assignments, student lists and applied subjects at the operating branch.
3.1. Administrative Class Interface Overview
- Breadcrumb: Overview > Classroom
- System headings: Administrative class (applies to the work branch, e.g. CG - Cau Giay).
- New creation button: Click the [+ Create class] button (orange) in the top right corner to start the new administrative class.
- Search function: Quickly search the class list in the Search box by class code, class name, program or field.
3.2. Managing the Administrative Class List
The table lists the full details of the administrative classes being managed at the branch (there are now 9 classes at the branch):
| Class code | Class name | The Key to Birth | The Branch | The Programming | The Most Numerous | The Sun | The Book |
|---|---|---|---|---|---|---|---|
| a | a | The key is 2026 (K2026) | CNTT (001) | The programme is open to all | 30 students | Active | See / Fixed |
| H2026 | Class 2026 B | The key is 2026 (K2026) | CNTT (001) | The programme is open to all | 40 students | Active | See / Fixed |
| HHHH | COPY_Test | The key is 2026 (K2026) | CNTT (001) | The programme is open to all | 30 students | Expected | See / Fixed |
| L2026A | Class 2026 A | The key is 2026 (K2026) | CNTT (001) | The programme is open to all | 40 students | Active | See / Fixed |
| loptest | The test copy class | The key is 2026 (K2026) | CNTT (001) | The programme is open to all | 30 students | Active | See / Fixed |
| loptest1 | loptest1 | The key is 2026 (K2026) | CNTT (001) | The programme is open to all | 30 students | Active | See / Fixed |
| loptest2 | loptest2 | The key is 2026 (K2026) | CNTT (001) | The programme is open to all | 30 students | Active | See / Fixed |
| loptest3 | loptest3 | The key is 2026 (K2026) | CNTT (001) | The programme is open to all | 30 students | Active | See / Fixed |
| loptest4 | loptest4 | The key is 2026 (K2026) | CNTT (001) | The programme is open to all | 30 students | Active | See / Fixed |
3.3. Class Management Actions
At the Task column for each class, users can perform the functions:
- Eye icon (See detail): Access the class details screen to view/manage the list of students, calendar and component subjects.
- Pen Tree icon (Edited): Updates class information such as class name, maximum number, training program, or operating status.
3.4. Creating an Administrative Class
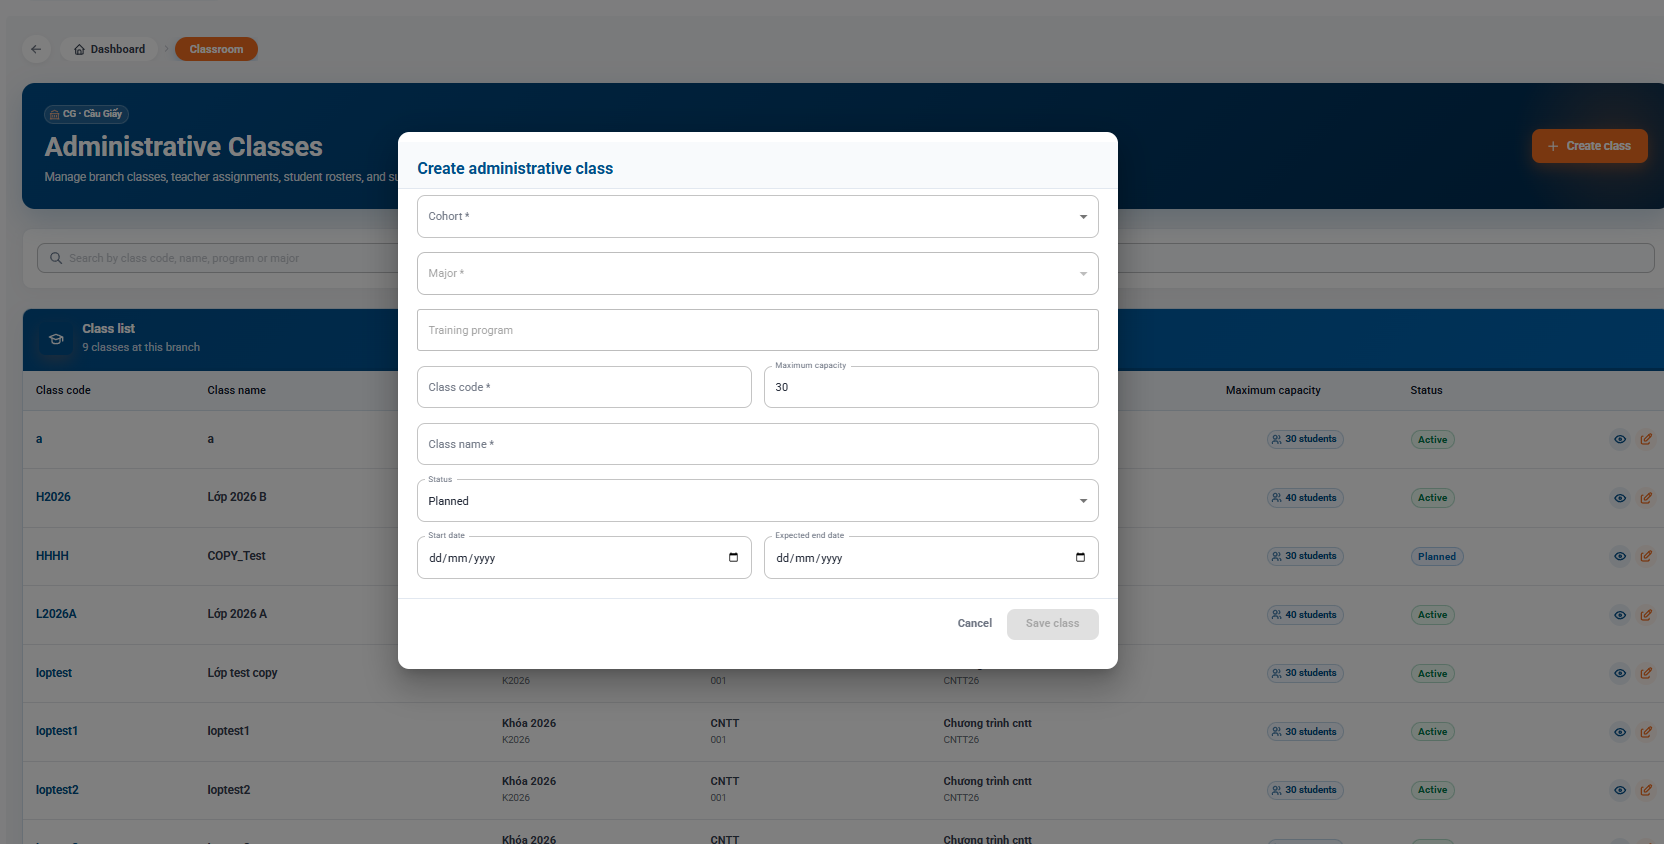
3.4.1. Opening the Create Window
At the main interface of the Administrative class, click the [+ Create class] button (orange) in the top right corner of the screen to display the Create administrative class dialog box.
3.4.2. Configuring Class Information
The user enters and selects the information fields as requested:
- Admission key (*): Select the applicable admission key from the drop-down list (e.g. 2026 key).
- Branch (*): Select the corresponding discipline from the drop-down list (e.g. IT).
- Training Program: Choose the training program framework applicable to the classroom.
- Class code (*): Enter the unique identifier code for the administrative class (e.g. L2026A).
- Maximum score: Enter the maximum number of students allowed in the class (default suggests: 30).
- Class name (*): Enter the full display name of the administrative class (e.g. Class 2026 A).
- Status: Select the operating status of the class from the drop-down list (default: Expected).
- Training time:
- Start date: Select the official date of the announcement (dd/mm/yyyy).
- Expected completion date: Select the date of completion of the expected course (dd/mm/yyyy).
3.4.3. Completing Class Creation
- Click the [Save class] button to record information and create a new class on the system.
- Click [Delete] to close the window and cancel the newly entered operations.
3.5. Class Details and Student Management
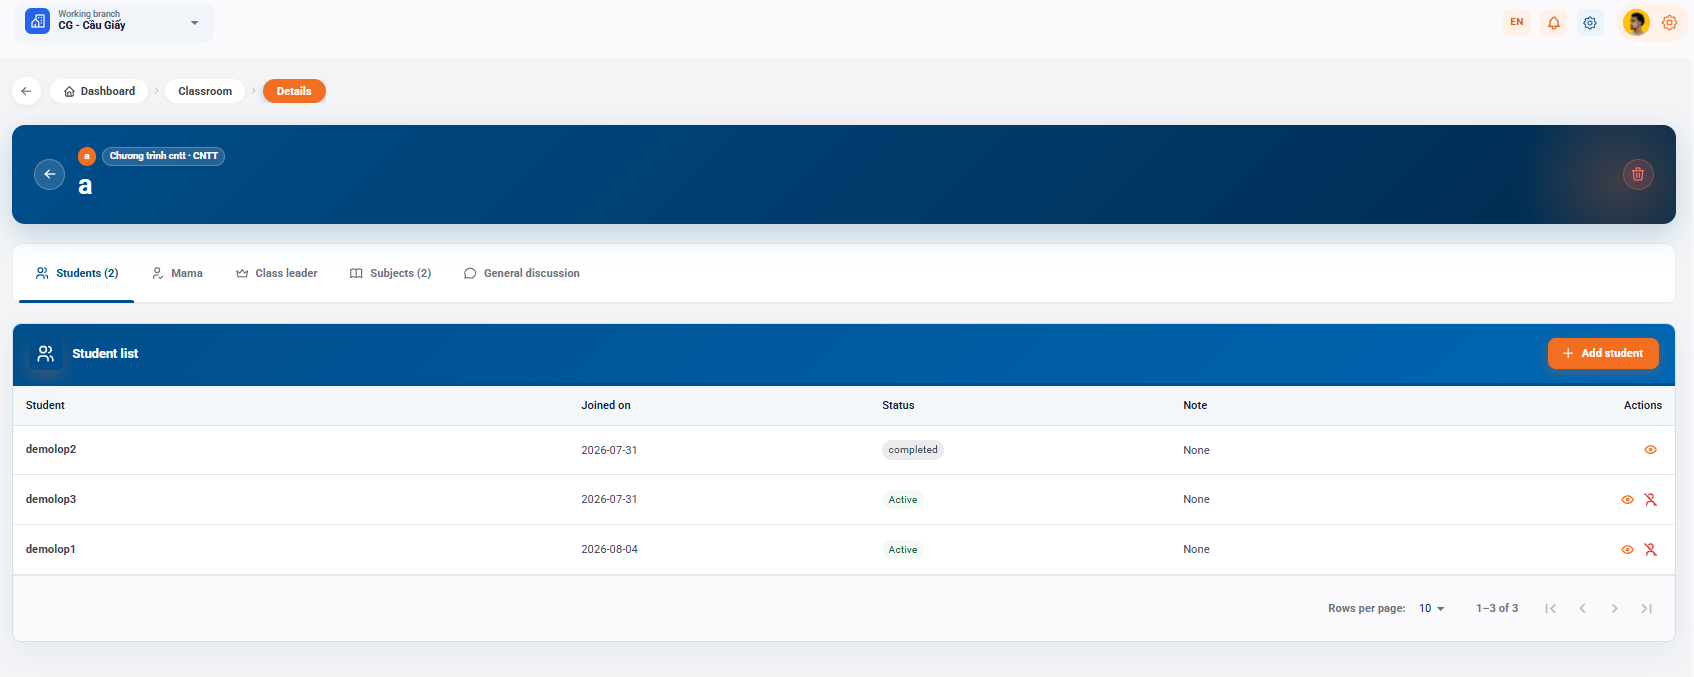
The Class Details screen allows the administrator to view the overview of the class (e.g. Class a - Cntt Program - IT) and manage the relevant components through the function tabs: Student, Mama (Assistant), Class Principal, Learning and General Exchange.
3.5.1. Managing the Student List
- Breadcrumb: Overview > Classes > Details
- Functional: Click [+ Added Students] (orange) to assign additional students to the classroom.
- The student list: | Student | Day of class | The State | Take a note. | The work | | --- | --- | --- | --- | --- | | demolop2 | 2026-07-31 | completed | No, I did not. | View Details | | demolop3 | 2026-07-31 | I was in school. | No, I did not. | - Watch. - Get out of the class. | | demolop1 | 2026-08-04 | I was in school. | No, I did not. | - Watch. - Get out of the class. |
3.5.2. Student Actions Within a Class
- Eye Symbol (See detail): Access to the information profile and detailed learning progress of the student.
- Remove/Remove (Remove from class): Remove or transfer the student status from the current class administrative list.
- Page classification: Customize the number of records displayed through the Line Number cell per page (default 10) and move the page through the navigation buttons below. The following is a section of the Calendar Management Guide/Trading Calendar (section 4) compiled to follow the standard Heading 1, 2, 3...) for Google Docs: