
Survey Management User Guide
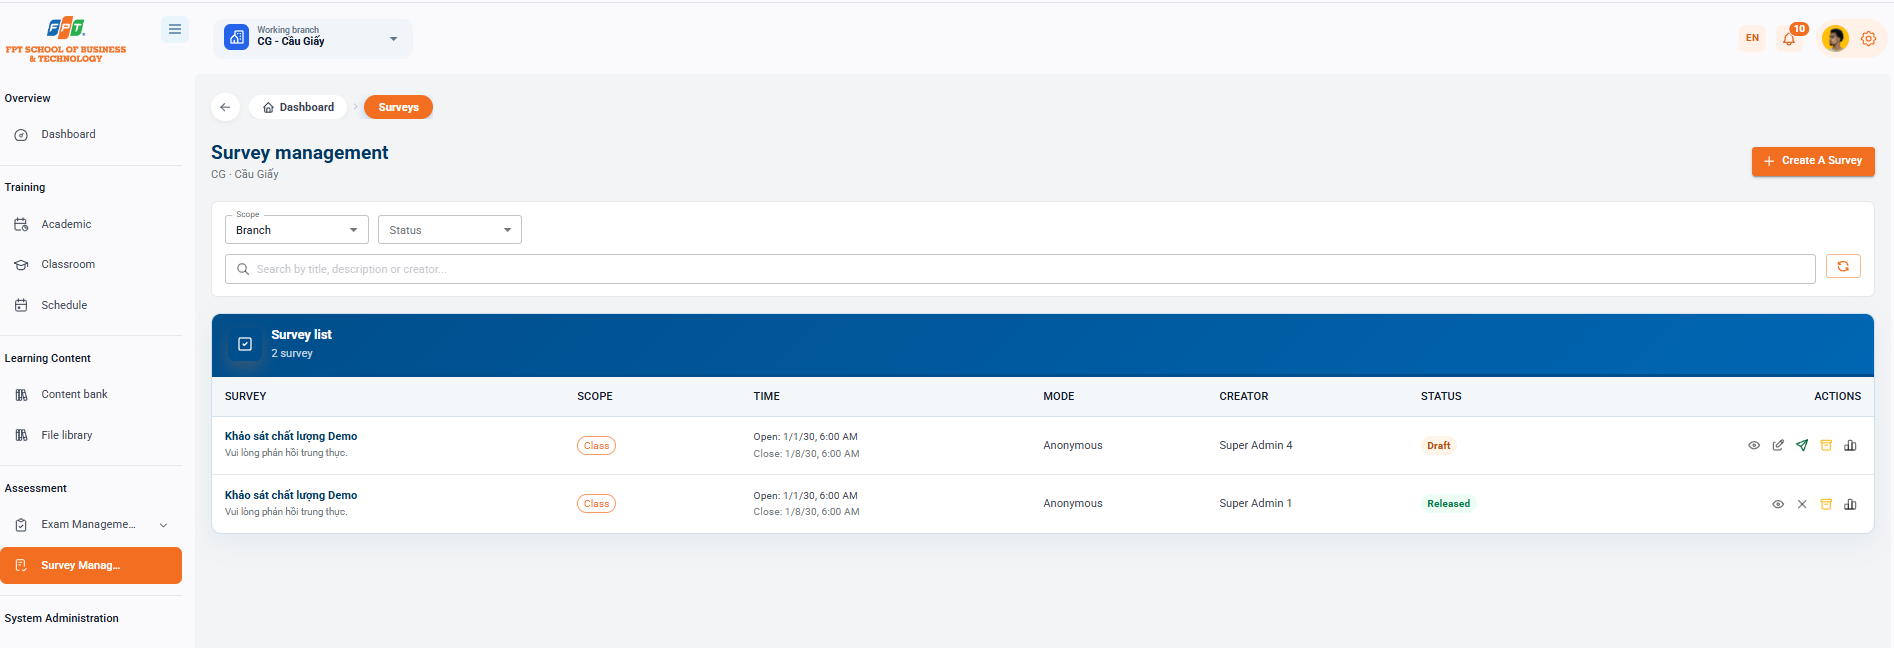
The Survey Management System under the Q&A section allows managers to initiate, implement and track survey responses from students, faculty, or staff across the department.
7.1. Survey Management Interface and Filters
7.1.1. Interface Overview
- Breadcrumb: General > Surveys.
- Name of the subsystem: Survey Manager (showing operational branch information, e.g. CG - Cau Giay).
7.1.2. Searching and Filtering Surveys
- Scope: Select the survey scope from the drop-down list (for example, Branch).
- Status: Read the list by the status of the survey roll-out through the Status section (Over, Closed, Answered...).
- Search: Enter the keyword in the Search box by title, description or creator....
- Update button: Click the round icon next to the search box to update the list data.
7.2. Managing the Survey List
The survey scoreboard shows all the details:
- Survey: Name/Title of the opinion poll.
- Scope: The level of survey performance.
- Time: Open and closed survey time.
- Form: Method of gathering opinions (e.g. noun, noun).
- The creator: The admin/management account that initiates the survey.
- Status: The working status of the survey.
- Activation: The toolkit for managing details (see results, edit, delete...). Note: If the system has not yet recorded any surveys, the screen will display the "Not a suitable survey" label.
7.3. Creating a New Survey
7.3.1. Opening the Create Window
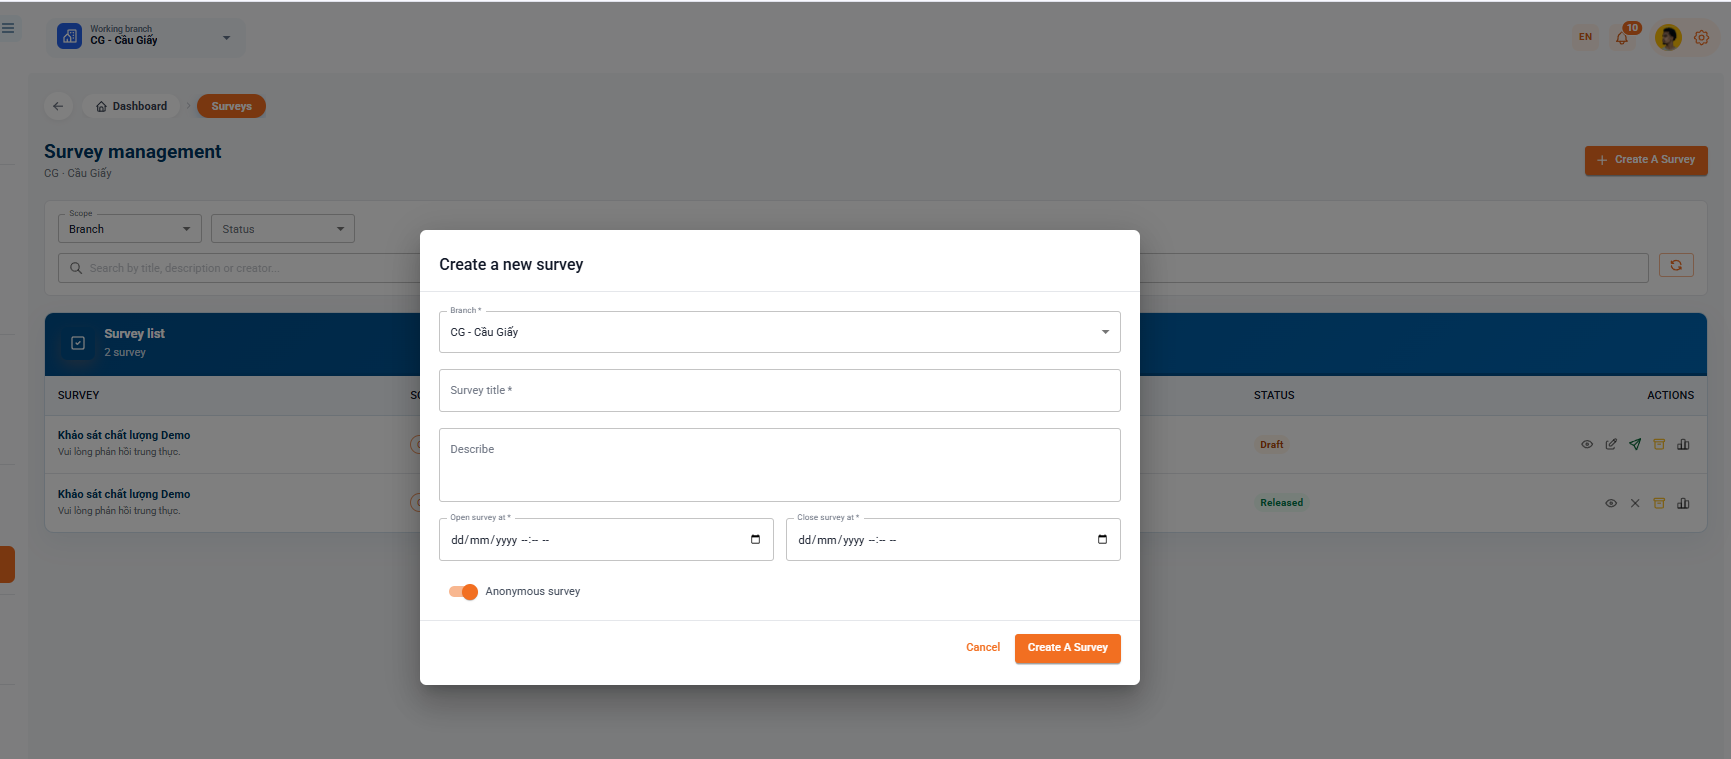
At the main survey manager interface, click the [+ Create Survey] button in the top right corner of the screen to display the Create new surveys dialog box.
7.3.2. Configuring Survey Information
- Branch (*): Select the branch that will run the survey (default: CG - Cau Giay).
- Survey Title (*): Enter the official display name of the survey in the Survey Title box.
- Description: Enter the details of the content, purpose, or instruction to be surveyed in the Description box.
- Time of deployment (*):
- Open survey time (*): Select the official start date and time to allow feedback (dd/mm/yyyy --:--).
- Closing the survey at (*): Select the date and time of the survey's completion (dd/mm/yyyy --:--).
- Configuration of anonymity: Switch the Anonymous Survey button to orange if you want to collect anonymous feedback on the identity of the participant.
7.3.3. Completing Survey Creation
- Click the [Create Survey] button (orange) to save the information and start setting the question.
- Click [Delete] to close the window and delete the information you just entered.