
Data Import User Guide
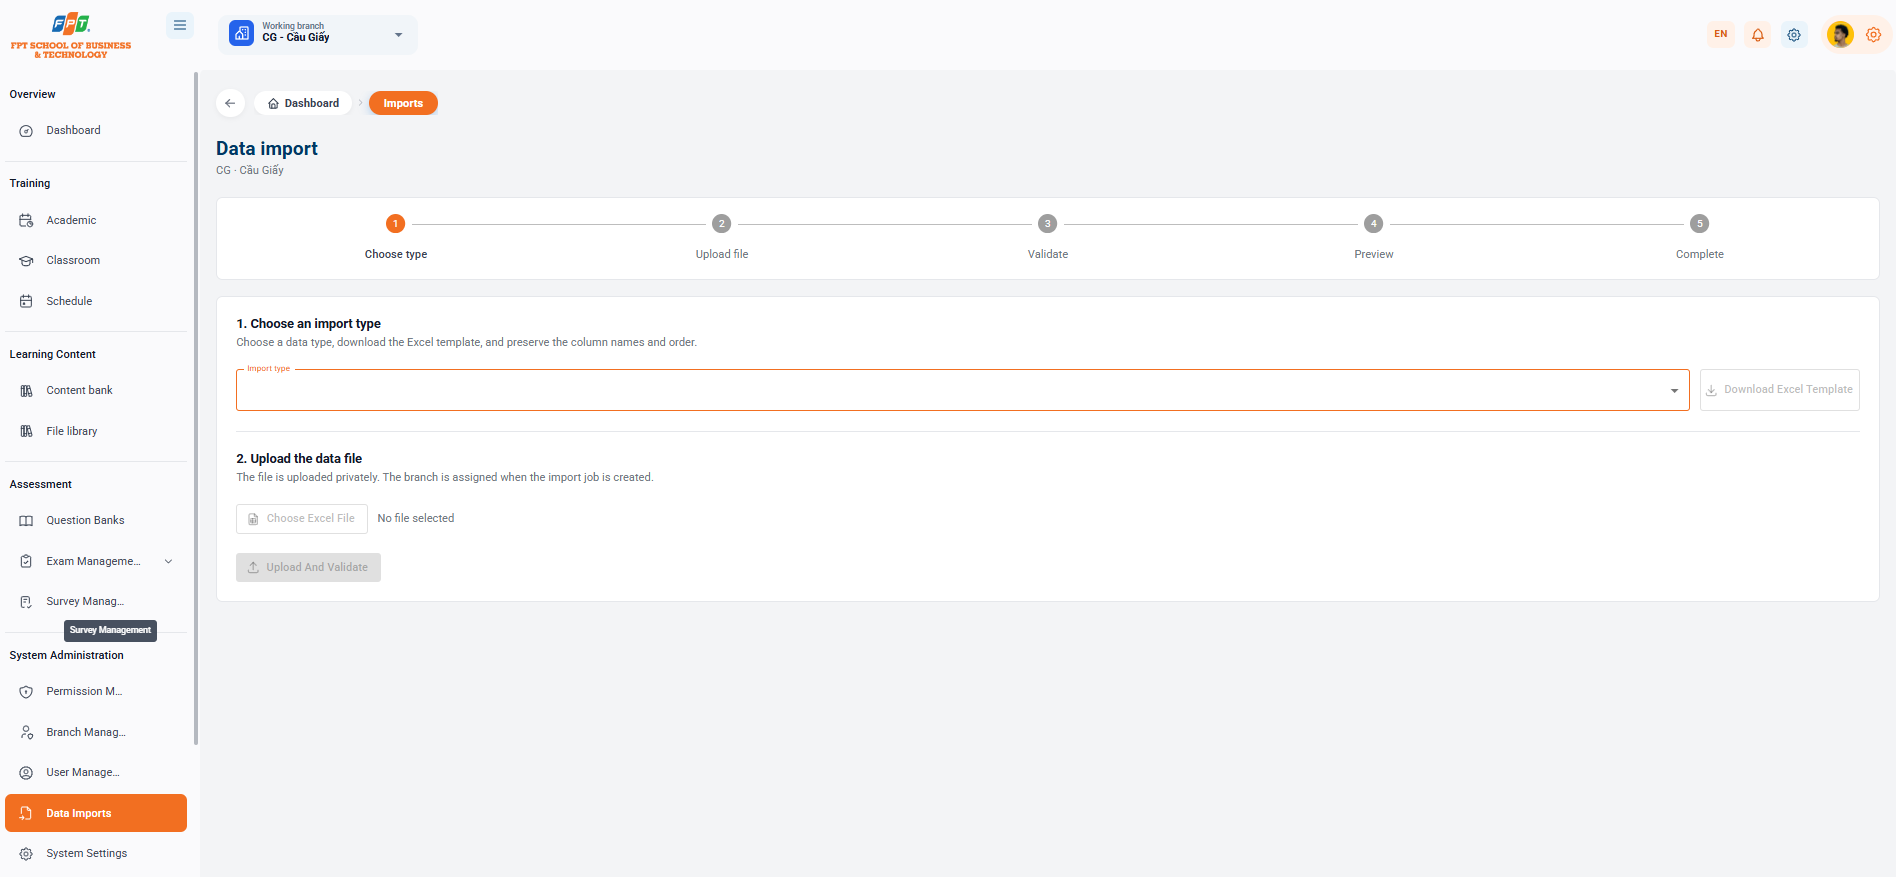
The Data Entry System subset System Management assists administrators to enter bulk data into the system through template Excel files, which helps optimize account startup times, courses, scores, and management configurations.
13.1. Data Import Workflow
The data entry process is standardized in five clear steps:
- Select category: Select the data folder to upload and take the corresponding Excel template file.
- Upload: Select the prepared data file from the computer to be uploaded to the system.
- Verification: Automatically scans and checks the validity of the data in the file.
- Preview: Preview the data after successful processing.
- Completion: Verify the official data entry into the system database.
13.2. Supported Import Types
The system provides a list of categories that support serial data entry:
- Account Management & Personnel:
- Creating accounts and records
- Bringing the instructor to class
- Get Mommy in the classroom.
- Formation Training & Classes:
- Creating an Industry
- Creating the admissions key
- Create an administrative class
- Making a lesson
- Bring the apprentices to class
- Calendar & Name of the team:
- Making history
- Enter the name
- Review and Question bank:
- Enter the point.
- Ask the question
13.3. Detailed Instructions
Step 1: Select an Import Type and Download the Template
- In the Import type dropdown box, select the data category to upload (e.g. Create accounts and profiles, Create administrative class...).
- Click the [Download Excel Template File] button on the right to download the standard format file (.xlsx) to your computer.
- Fill in the data to enter the template file, and keep the column names and order in the correct order.
Step 2: Upload the Data File
- In the Upload data file section, click the [Select Excel File] button to select the prepared data file from the computer.
- After the file is selected successfully, press the [Upload and Check] button (grey/orange) to move the system to the check and check step. Note: The file is uploaded in private mode. The work branch (e.g. CG - Cau Giay) will automatically attach when importing the job.